Categories
How to Apply 3D Wall Panels: A Step-by-Step Professional Guide
How to Install PS 3D Wall Panels
Preparation Steps
Preparation is key to installing PS 3D Wall Panels properly. Ensuring the wall surface is smooth enough is very important for any glue to successfully stick to the wall. You will need to measure the area that will play host to the panels to know how many panels you will need. Hence, acclimatizing the panels in the room for at least 24 hours before the installation is recommended for adapting the panels to the temperature and humidity of the room.
Cutting to Appropriate Size
Available in most hardware stores PS 3D Wall Panels are also cuttable using regular tools. Take a measuring tape and pencil, and mark each panel for where cuts are required. Pay attention to using a circular saw. Make sure all cuts are true and smooth for a flush fit when fitted.
Applying Adhesive to the Panel Back
After cutting the panels to size, spread the adhesive evenly on the backs. Use a recommended adhesive by a manufacturer of optimum quality. Put on enough adhesive to coat all of the surface area, but not so much that it seeps out when you press it versus the wall, which it will.
Hiding Pin-marks
After installation, any pin marks/blemishes must be hidden from view to appear flawless. Paint or match filler that matches the panel color and texture you need to repair (if required). This step guarantees that each of the panels looks the same and appears professionally installed. This step ensures each panel has the same appearance and looks professionally installed.
Handling Corners
When installing, corners can be particularly tricky as if not dealt with correctly, can break the continuity of the material. Cut panels at angles that match corner ends to minimize gaps. If available, you may want to use corner trims, which offer a polished look and added stability at these intersections. Finally, if your fence system has them, consider corner trims for both a super nice finish and additional support at these joints.
How to Install WPC 3D Wall Panels
Using an Electric Saw for Cutting
WPC 3D Wall Panels are made of wood and PVC, it is a kind durable product, but very easy to cut with an electric saw. Before making the cut, you have to mark your measures very clearly so that they basically fit perfectly. An electric saw will make for smooth edges and save much time on installation.
Applying Adhesive Without Nails
With WPC panels, you can install them without nails as they can be secured in position with adhesive only. Select a PVC and Wood suitable glue and put a fair amount of it on the back side of individual panels, making sure to avoid overusing it and causing unnecessary mess once pressing to walls.
Gently Pressing onto Smooth Walls
The adhesive is applied, and then pressing panels to smooth walls. Press evenly across each panel to ensure no bubbles or misalignments occur between the panels. This will apply equal pressure on each panel to properly stick it on the window.
Inserting Metal Trims
While WPC wall panels largely maintain the design and feel of natural materials, small metal trims can also be used to accent WPC 3D Wall Panels to provide that clean linear look between a joint, or at edges. These decorative pieces not only provide a delicate appearance, but also protect the edges of the wall panels, preventing wear and tear
How to Install MDF 3D Wall Panels
Tips for Cutting Panels to Size
Precision And Tools For Cutting MDF 3D Wall Panels Use a handsaw or a power saw with a blade designed for silicone timber or MDF material. It makes the edges smoother and less prone to chipping.
Applying No-Nail Adhesive Properly
Spread no-nail adhesive the glue across the panel back, zigzag manner, to sticking strong. Hold the panel against the wall, apply pressure until the glue sets. While this style gives a nice clean edge, it also functions incredibly in holding the weight of the panels.
Covering Pin Marks Effectively
These marks need to be covered after securing panels with pins or nails for a professional finish. If you can still see the holes, fill them in with wood filler or putty that matches the color of your panels. When dry, lightly rub the region smooth, then apply touch-up paint if needed.
INTCO Provides Top 3D Wall Panel Products and Services
Advantages of 3D Wall Panels
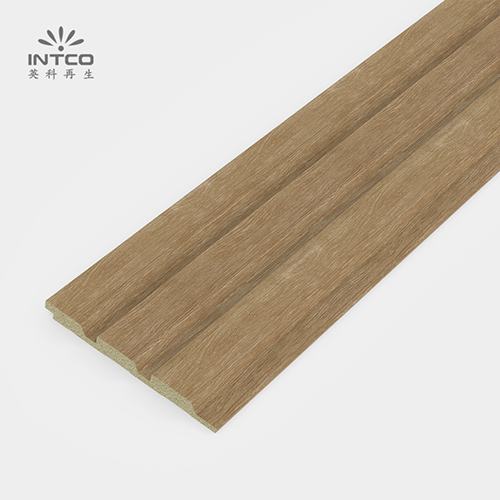
INTCO offers a wide selection of 3D Wall Panels with functional and aesthetic appeal. These panels are available in PS, WPC, and MDF, having unique advantages as follows:
- Versatility:Available in numerous colors, textures, and designs to suit diverse aesthetic preferences.
- Ease of Installation:Designed for user-friendly installation with common tools.
- Environmental Compliance:Our panels are made from recyclable materials and meet stringent VOC standards.
These advantages make INTCO 3D Wall Panels an excellent choice for enhancing interior spaces while maintaining environmental responsibility.
Comprehensive Support Services
INTCO not only provides high-quality products but also offers comprehensive support services to ensure customer satisfaction:
- Consultation Services:Expert advice on selecting the right type of 3D Wall Panel based on specific project needs.
- Installation Guidance:Detailed instructions and support throughout the installation process.
- After-Sales Support:Ongoing assistance post-installation to address any issues or concerns.
By choosing INTCO products and services, customers benefit from innovative design solutions backed by professional support every step of the way.


